Instructional video
Installation video
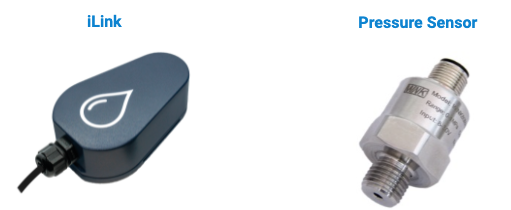
Content of the box
- 1 Droople iLink (LoRaWAN communication module)
- 2 Smart pressure sensor
- 1 lithium-ion battery
- 1 Torx screwdriver T8
Safety information
- Keep the device out of the reach of children.
- Do not expose the iLink to temperatures below -20°C or above 60°C.
- Do not expose the pressure sensor to liquids below -40°C or above 85°C.
- Do not expose the pressure sensor to pressure above 10 bar (1.0 MPa) [1].
- During installation, cleaning or decontamination of the sensor, the iLink should be disconnected from the sensor and protected from water or other fluid.
- Basic knowledge of plumbing is required to install the sensor on water points.
Gateway installation & setup
Install the gateway by following the instruction below corresponding to the gateway model you received.
Sensor installation
First connect the sensors to the iLink, then only after this, turn on the iLink
It is very important that you do not remove the plastic tab protecting the battery before connecting the iLink to the sensors. First plug the sensors, then remove the plastic tab. If you mistakenly removed the plastic tab first, you will need to open the iLink, then remove and put back the battery manually to trigger a reboot.
-
Using two T fittings, install the sensors into the pipe on both sides of the asset you want to monitor (IN and OUT). Both pressure sensors have a male threaded G1/4” connection. It can be easily installed in place of an analog pressure gage.
Depending on the asset, the installation of the sensor should be made by a professional plumber and may require additional fittings. -
Connect the sensors to the iLink using the M12 connectors cables.
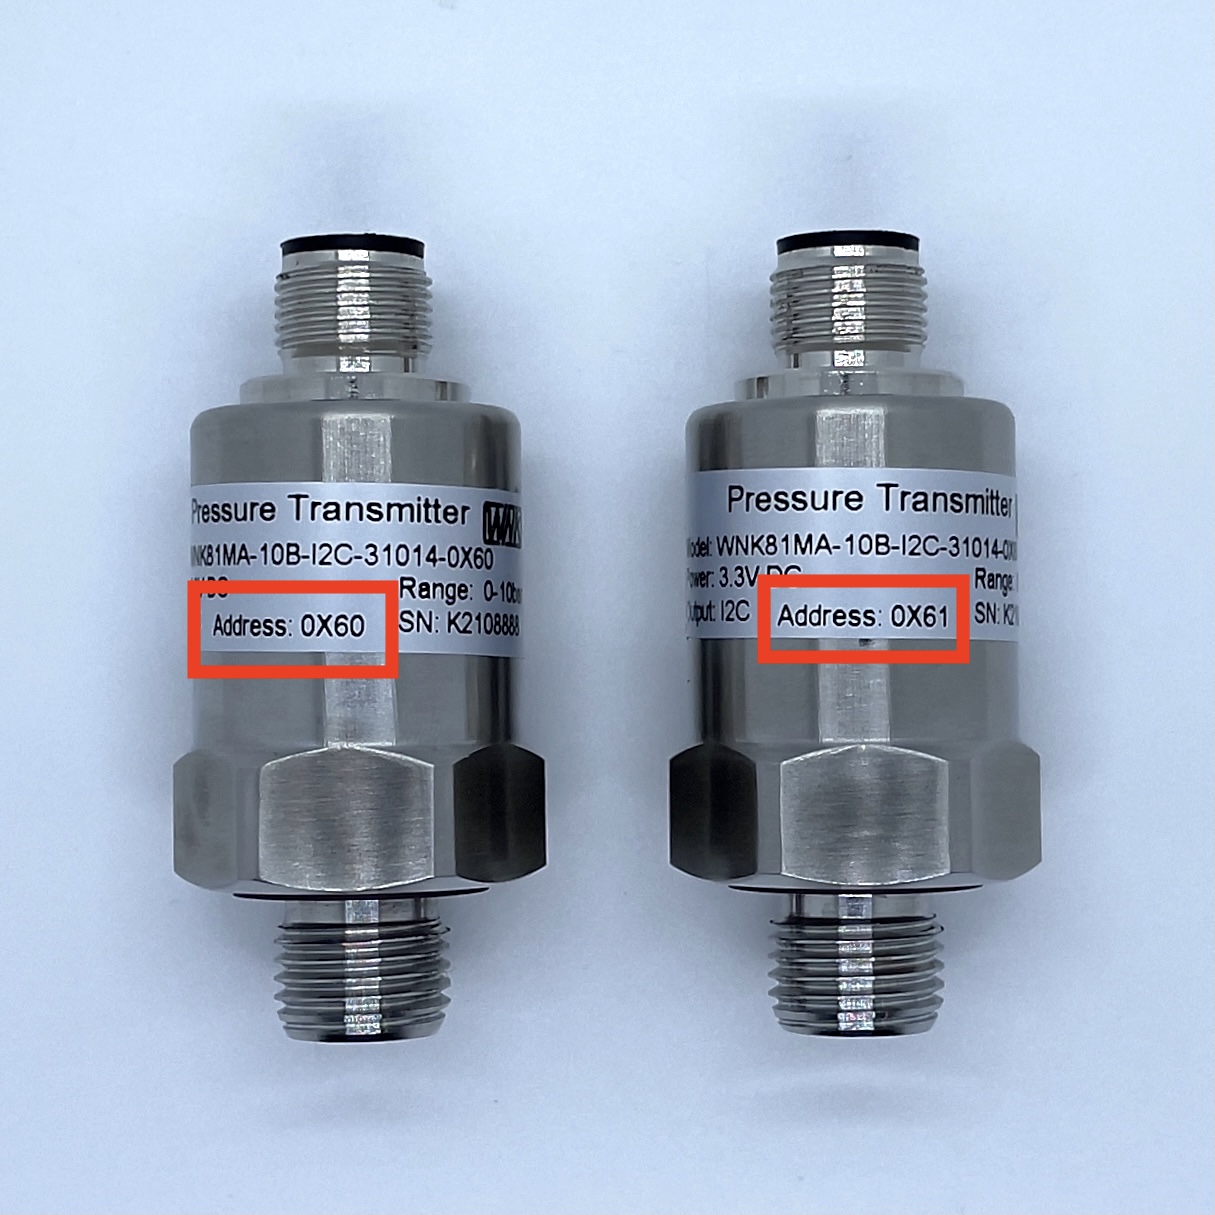
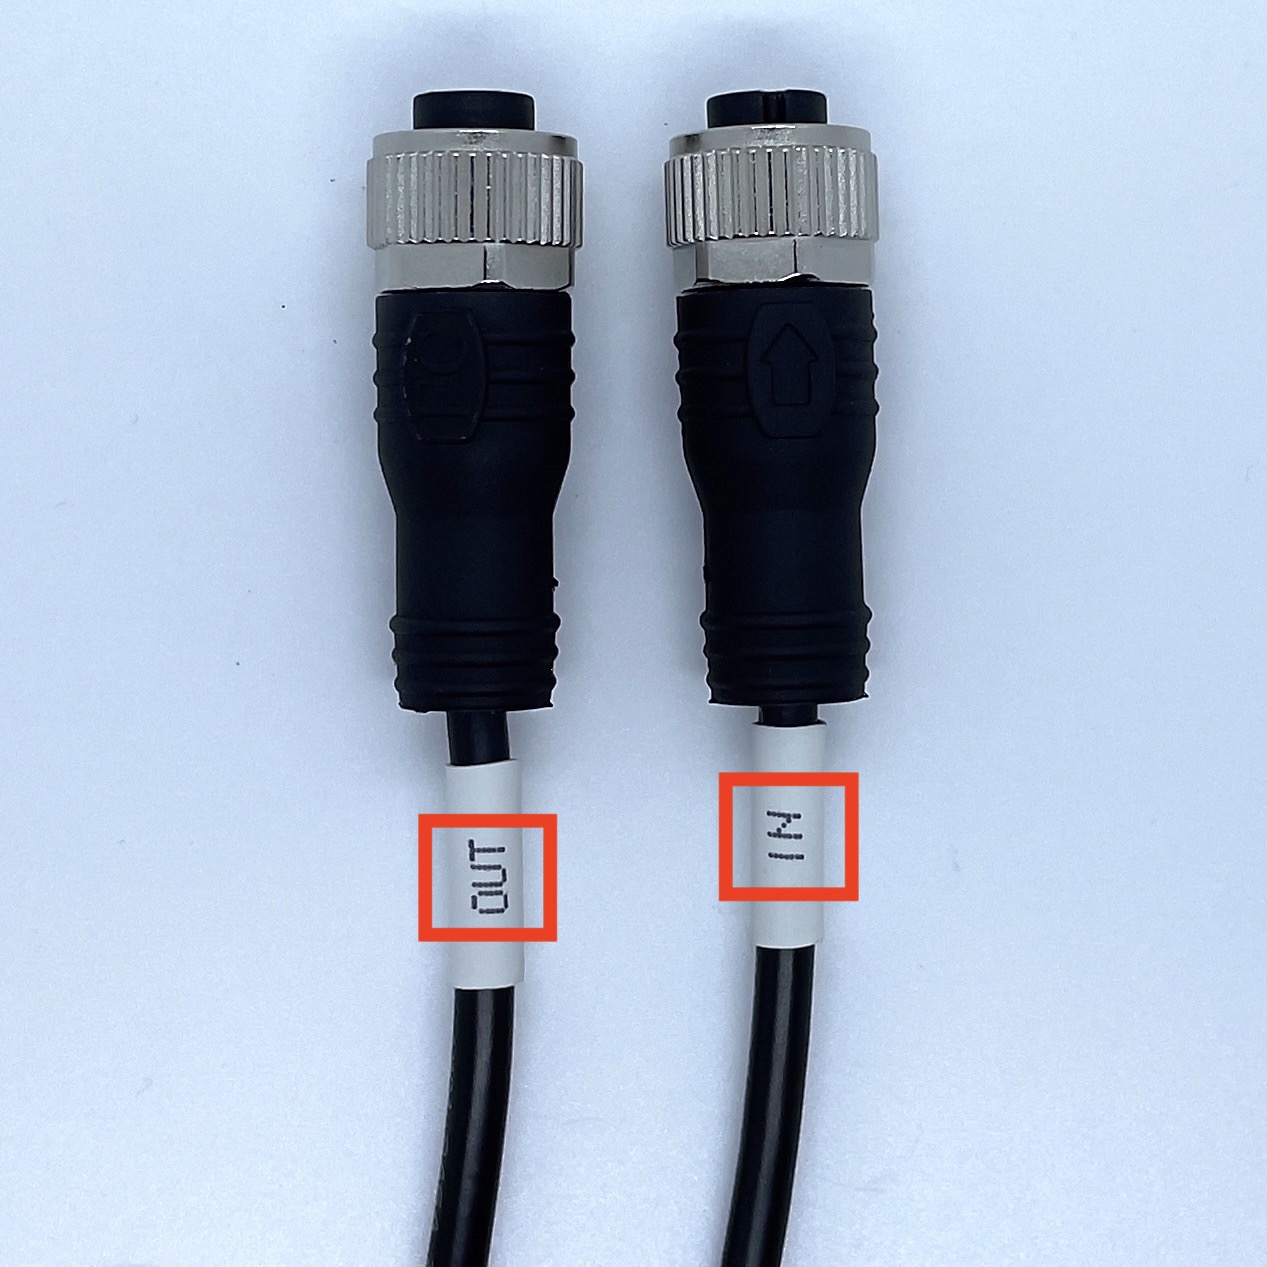
At this stage, be careful to note which sensor (0X60 and 0X61) is installed and connected to the “IN” or “OUT” cable of the iLink (see picture below). This information will be needed to configure the asset on the platform.
- Place the iLink in a way that no water can leak onto it. Use zip ties or double-sided tapes to secure its position.
Configure your asset on the Droople App
Each iLink is associated with an asset. We are going to configure the asset by defining the iLink and sensor associated with it.
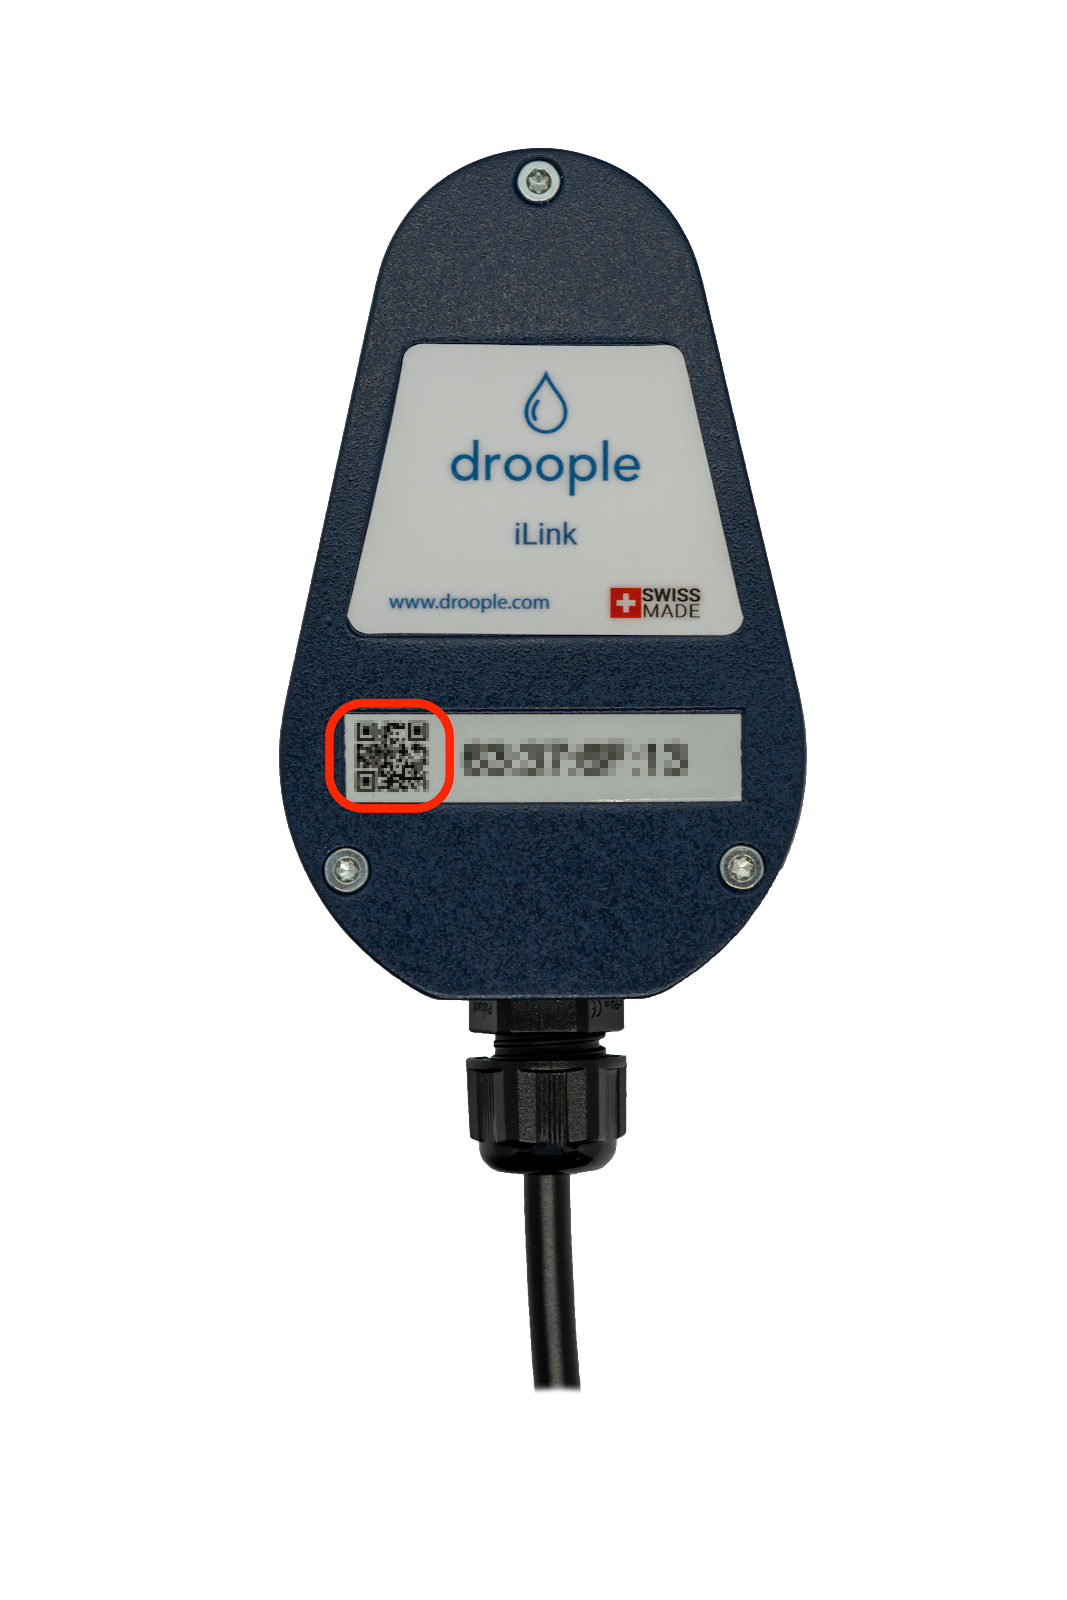
- Scan the QR Code on the iLink with your smartphone [2]
- Create an account or log in if you have one already.
- Once logged in, you will be redirected to the setup page. If you already have created the asset, click on the button Attach to an existing asset and choose the asset from the drop down list, otherwise click on Create the asset associated with the device.

-
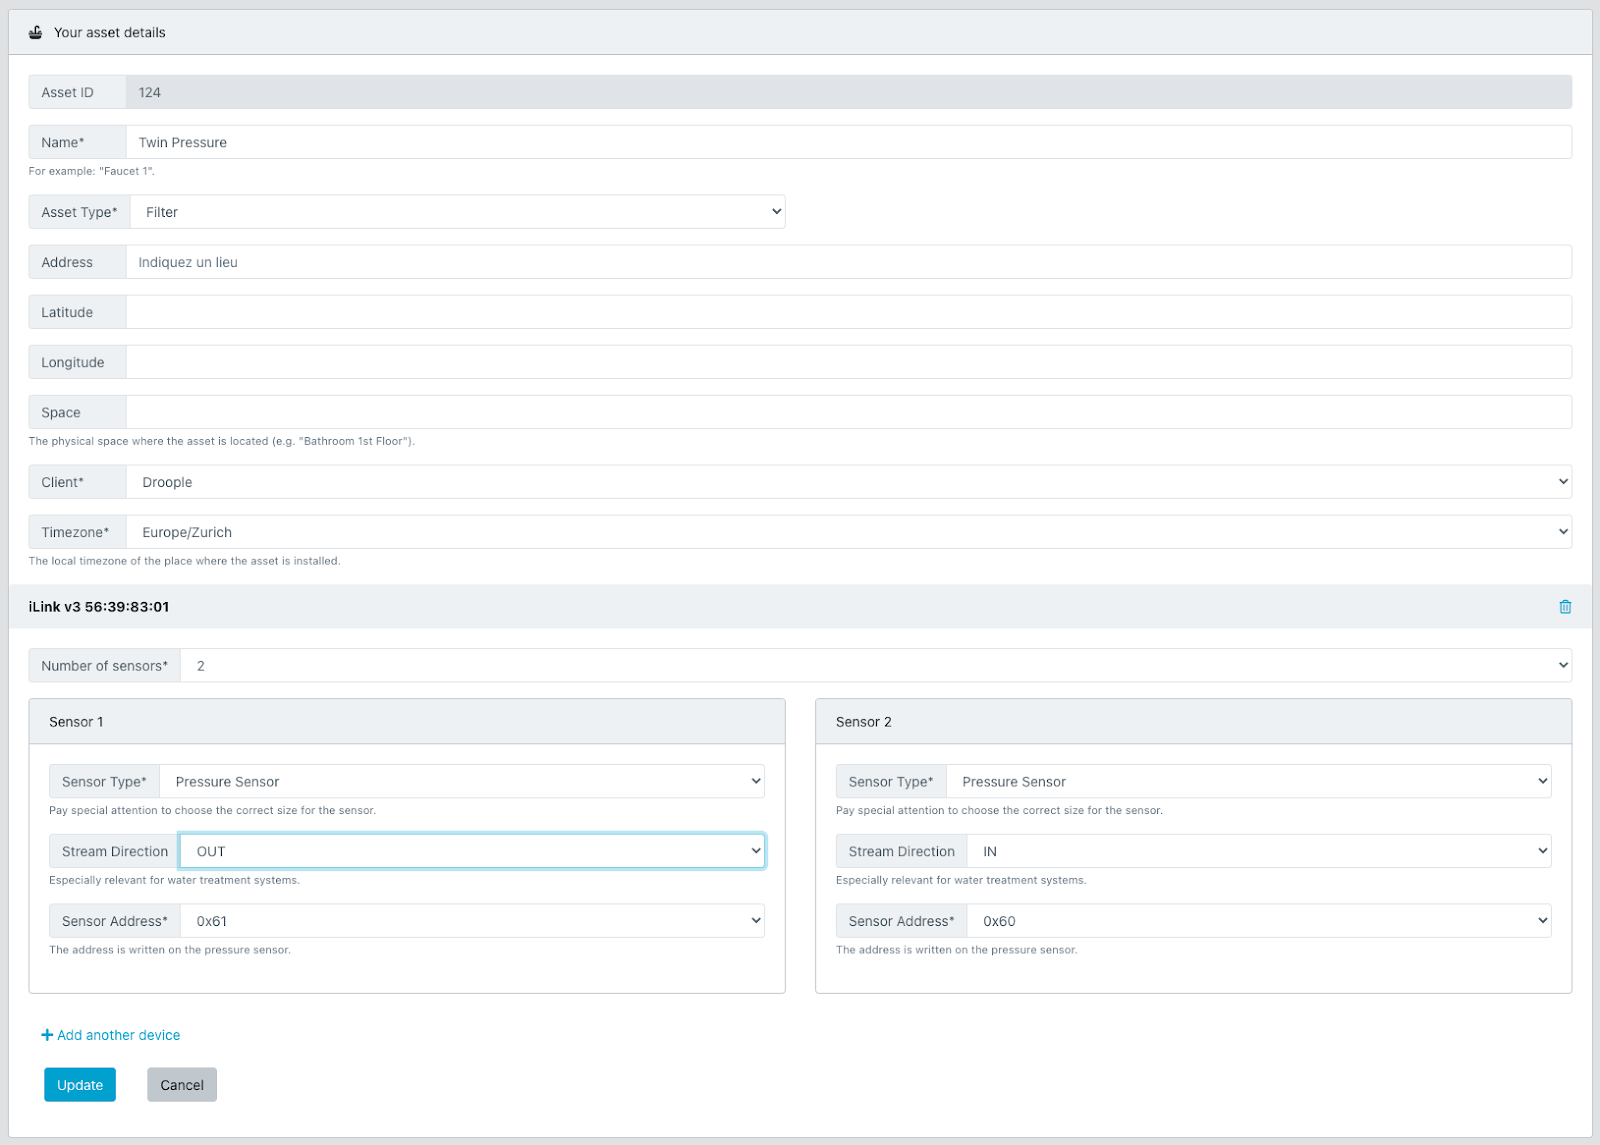
If you selected “Create the asset associated with the device”, configure your asset
a. Name: the name of your asset. E.g. “Filter 1”
b. Asset Type: in the drop down list, select the asset type or create your own by clicking on “Other”
Address: this information is used to display your asset on the map.
c. Space: The name of the physical space where your asset is located. E.g “Machine room 1”
d. Timezone: your local time zone -
Configure your iLink sensor(s)
a. Specify the number of sensors connected to your iLink (2 for a Pressure Twin)
b. For each sensor:
i. Select your sensor type. In this case, choose “Filter pressure sensor”
ii. Stream direction: Select “IN” or “OUT” depending on the position of the sensor on the asset.
iii. Sensor Address: This address is written on the pressure sensor. Be careful to select the right sensor address for the “IN” and the “OUT” sensor. (You should have written this informations during the installation of the sensors)
-
Click “Create”. You will then be redirected to the list of your configured assets.
-
Your metrics should now be available in the menu under “Metrics Overview”.
Let’s see if the magic works
- Connect to the Droople App and see if some data are displayed in the Metrics Overview dashboard. Note that the Droople App will need up to 10 minutes to display the first data points.
You should be able to see the pressure IN & OUT on the Pressure tab, as well as the difference between IN & OUT on the Pressure Drop tab:
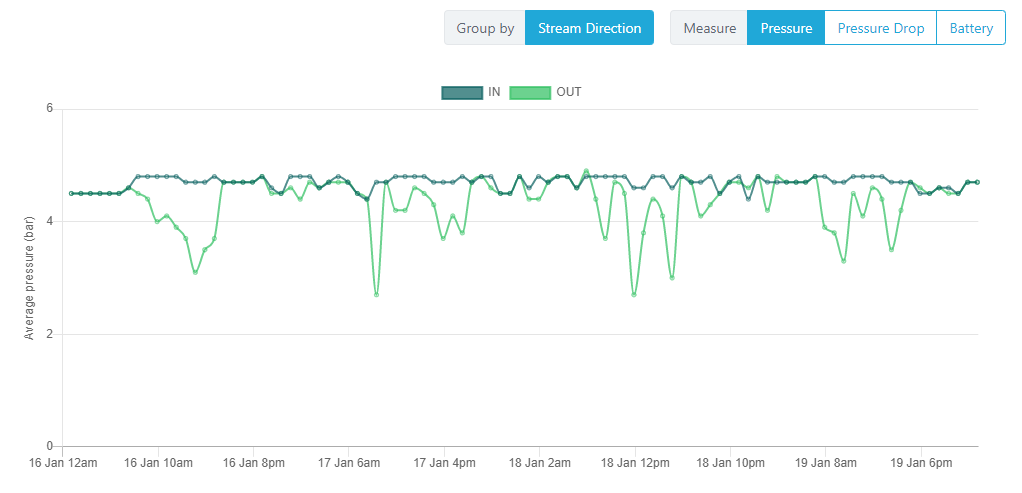
Pressure IN & OUT
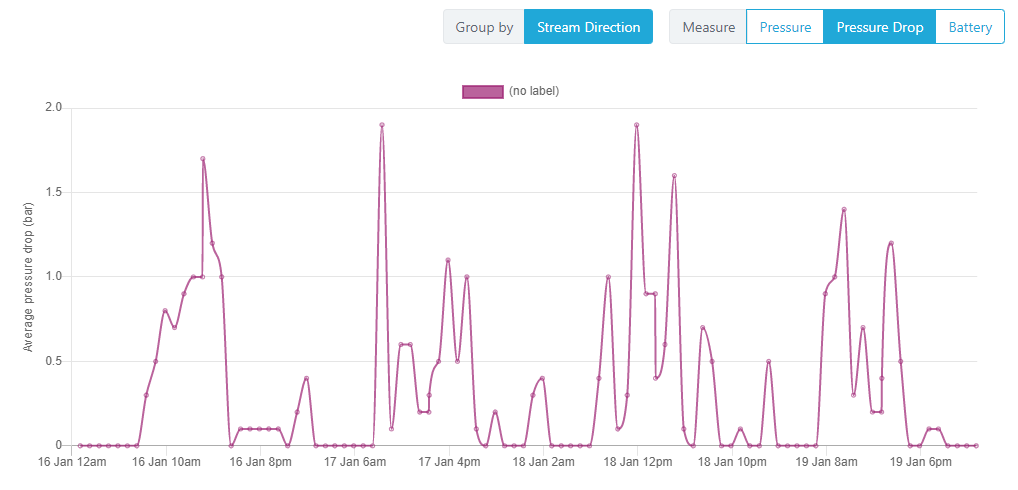
Pressure drop = [pressure IN] - [pressure OUT]
- Congratulations! You have successfully installed the Droople Smart Pressure. It’s time to take a break and enjoy a good glass of water :-)
Your see a different pressure for IN & OUT, but your pressure drop is always zero?
In this case, please make sure that you have correctly labeled your input. The pressure IN should always be higher than the pressure OUT. If you are certain that you configured the system correctly and the pressure drop is still zero, please contact the support team for guidance.
Configuring Consumables With Pressure Drop
For each consumable attached to an asset that is equipped with a Pressure Twin solution, you can configure custom thresholds. Every 24h, our system will check for your assets' pressure drops and notify you by e-mail if the thresholds are exceeded.
See managing and monitoring consumables from the User Manual for more details.
[1] Depending on the model, the pressure limit can go up to 100 bar.
[2] depending on your smartphone, you may need to install a QR scanning app separately for this operation: iPhone / Android
