PicoNext 4G gateway

Installation and setup
What's in the Box?
- PicoNext gateway
- AC adapter plug
- 4G antenna
- LoRa antenna
Note: There is also a version available that includes 4 antenna ports to support additional connectivity options.

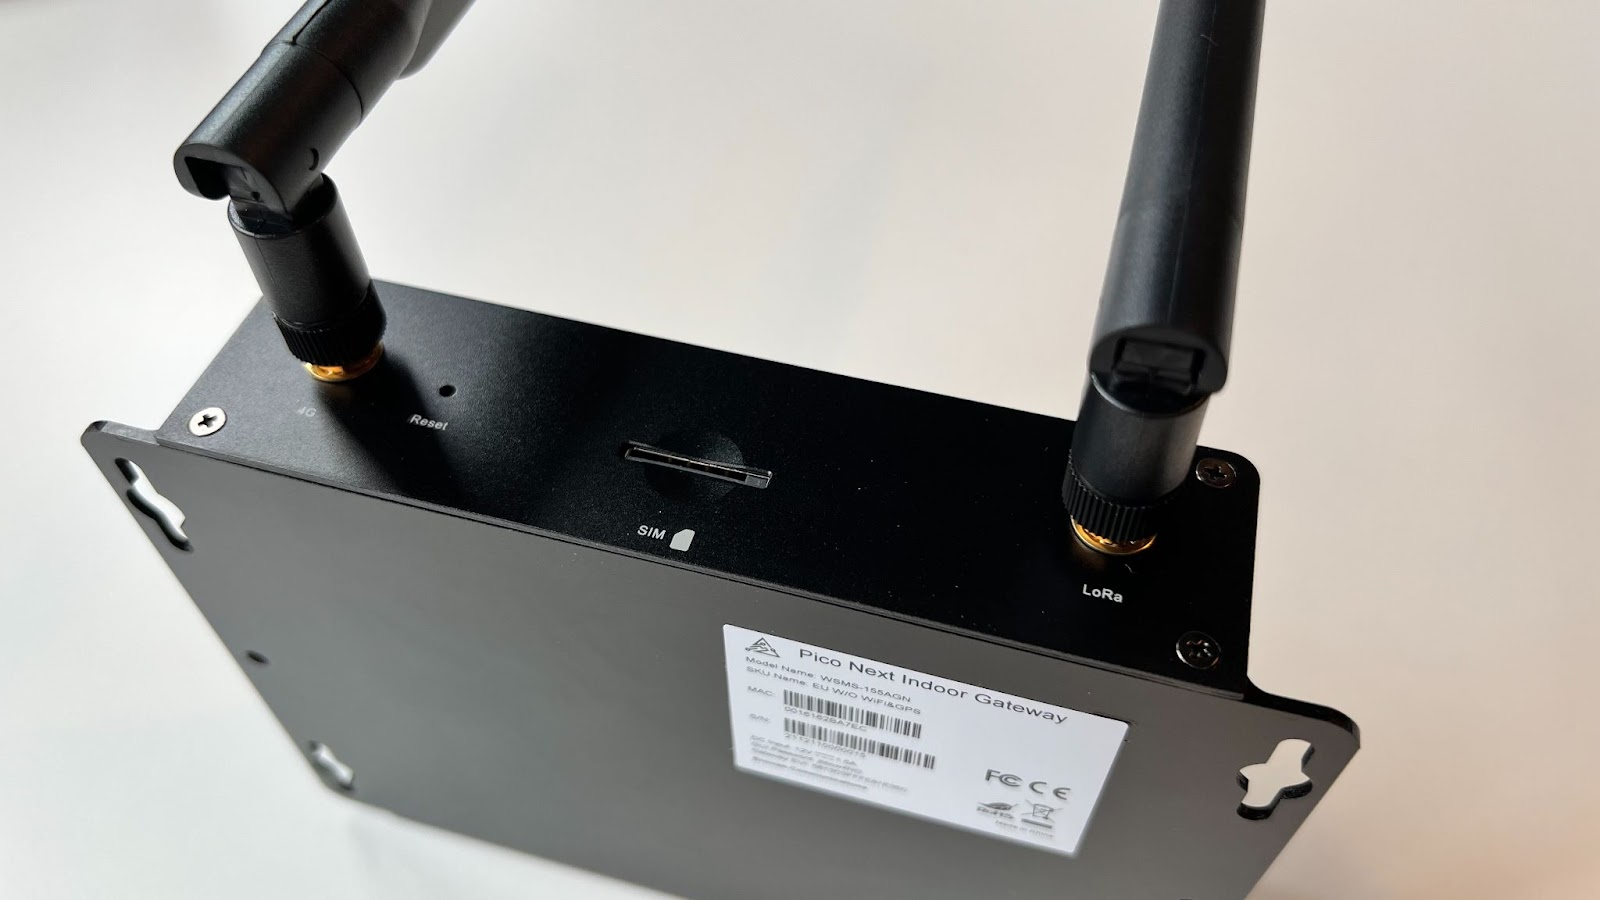
- Screw the LoRaWAN antenna to the right connector of the gateway (the LoRa antenna is marked with a sticker)

- Screw the 4G antenna to the left connector gateway

- The two antennas are now installed
Note: Here is the version with 4 antenna ports. Below is how to connect the three antennas included in the box.

- Plug the AC adapter to the PicoNext gateway and plug it into a wall socket. The gateway should ideally be installed in the same room as the iLink.

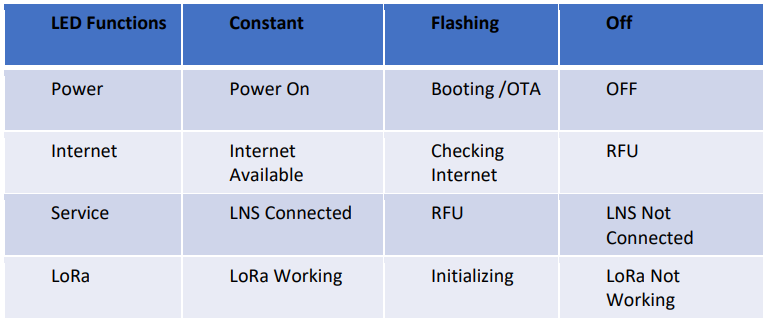
- Once plugged in, the gateway will start automatically. After 5 - 10 minutes, all the LEDs should be solid green if the gateway is correctly connected.
- You’re done!
LED Functions